Installing a security camera in your home is not straightforward. Security cameras come with a variety of features and options. Since not all cameras are created equal, additional steps may need to be taken before placing them in or around your home. We outline how to install security cameras and what you may need to consider before taking that first step.
Security cameras can have many configurations and considerations. Before installing them in the home, you will need to know everything the surveillance camera will require to run correctly. For example, some cameras may need a plug-in power source to work. Others may simply need batteries, Wi-Fi, SIM cards, or an ethernet connection.
Some systems may be set up to work when you take them out of the box, while some may need a DVR or hub. You will need to know all these nuances before beginning the installation process. If you don’t, you may be stalled out until you have all the pieces in place. Knowing this beforehand will eliminate any frustration and delays, not to mention additional expenses.
Step 1: Plan Your Security Camera System
Before purchasing and installing security cameras, plan where you need coverage. Identify key areas such as entrances, driveways, backyards, and any blind spots.
Factors to Consider:
- Camera Type: Choose between wired, wireless, or battery-powered cameras.
- Field of View: Ensure cameras cover wide areas with minimal blind spots.
- Indoor vs. Outdoor Use: Outdoor cameras should be weather-resistant.
- Power Source: Decide between wired connections, battery-operated, or solar-powered options.
Step 2: Choose the Right Security Camera
Different types of security cameras cater to different needs:
- Wired Cameras: Provide reliable, continuous recording but require professional installation.
- Wireless Cameras: Easy to install, but rely on Wi-Fi, which can be disrupted.
- Battery-Powered Cameras: Portable and ideal for hard-to-reach areas.
- Smart Cameras: Offer remote monitoring, motion detection, and cloud storage.
Best Indoor Wired Security Camera
Blink Mini – Compact indoor plug-in smart security camera

Ring Stick Up Cam Plug-In

Best Indoor Wireless Security Camera
Kasa Smart Indoor Pan-Tilt Home Security Camera

Best Outdoor Wireless Security Camera
Ring Outdoor Cam (Stick Up Cam) Wireless Outdoor Camera

Best Indoor/Outdoor Battery-Powered Security Camera
AMTIFO Security Cameras
Best Indoor/Outdoor Smart Security Camera
WYZE Cam OG Indoor/Outdoor 1080p WI-Fi Smart Home Security Camera

Step 3: Install the Security Cameras
Tools Needed:
- Power drill
- Screws and anchors
- Ladder (if mounting high)
- Ethernet cables (for wired cameras)
- Smartphone (for setup and testing)
Installation Process:
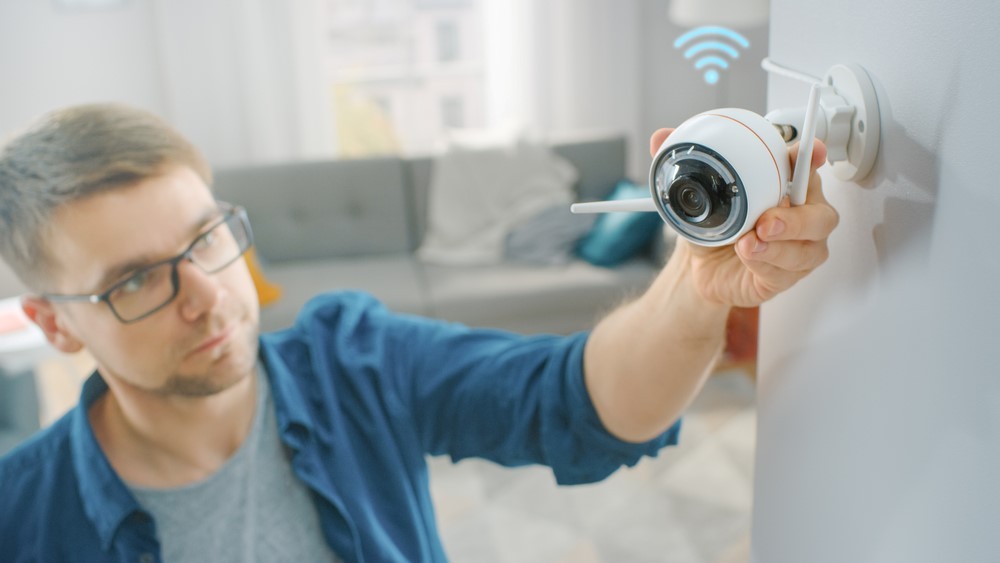
- Mount the Camera Brackets
- Use a power drill to secure mounting brackets in the chosen locations.
- Ensure the brackets are positioned to cover the desired area without obstructions.
- Attach and Adjust the Cameras
- Secure the camera onto the bracket.
- Adjust the angle to maximize coverage.
- Ensure cameras are high enough to prevent tampering.
- Connect and Power Up the Cameras
- For wired cameras, connect to the power supply and DVR/NVR system.
- For wireless cameras, follow manufacturer instructions to connect to Wi-Fi.
- If using a battery-powered camera, charge and insert the battery.
- Configure the Camera Settings
- Download the manufacturer’s app for smart cameras.
- Adjust motion detection sensitivity, recording schedules, and notifications.
- Set up cloud or local storage for video recordings.
Step 4: Test Your Security Cameras
After installation, conduct a thorough test to ensure all cameras function properly:
- Check video quality and angles.
- Ensure motion detection and night vision work.
- Test remote access and notifications.
Step 5: Maintain and Secure Your System
Regular maintenance ensures optimal performance:
- Check Camera Lenses: Keep lenses clean to maintain clear footage.
- Update Firmware: Prevent security vulnerabilities by keeping software up to date.
- Secure Your Network: Use strong passwords and enable encryption for wireless cameras.
- Inspect Cables: Ensure no damage or loose connections for wired cameras.
Do Security Cameras Deter Crime?
Many homeowners wonder about installing a security camera in their homes. One study interviewed 400 people convicted of breaking and theft. Interviewers asked what things would deter them from targeting a house. The most frequent response was if security cameras were placed on the property.
It’s a good idea to have one visible surveillance camera along with others that are hidden.

Advantages and Disadvantages of Security Cameras
As with anything, there are pros and cons to installing a security camera. Security cameras have evolved over the past few years, making them more technologically advanced and affordable. However, with these advancements come the good and bad surrounding the product itself.
Advantages
- Deters Crime. Cameras dissuade intruders from damaging your property and reduce burglary and trespassing crimes. The same UNC study mentioned above also discovered that outdoor cameras reduced property crimes by 50%.
- Monitors Activities and Scenarios. While you are away from home, you might be concerned about a break-in. This is especially true for parents concerned about their family or how the children interact with their babysitter. Surveillance provides peace of mind knowing those you love are protected.
- Provides Evidence. Cameras are handy when you need to monitor others. Modern cameras can capture audio and video. This aids eyewitness testimony as it will provide additional details or corroborate the story.
- Helps to Make Proper Decisions. Footage aids in making a fair decision when a dispute arises. Whether it is a disagreement or an issue between two people, you can clarify all doubts using footage. It will also disprove any fabricated claims that arise.
- Keeps a Record. Cameras tell how an incident transpired and can be used to monitor traffic.
Disadvantages
- Lack of Privacy. While cameras are ideal for watching for illegal behavior, aggressive behavior, or threats, everything is recorded. Surveillance will inevitably record everything that happens along with facial recognition.
- Can Be Expensive. Depending on the system, the cost of running a cable, labor, and installing different products within a system can add up. This may not apply to a small system, but the more extensive you go, the higher the cost. However, adding the extra cost may be worth it because it will produce great results.
- Cameras Are Vulnerable. They are electronic devices, and prolonged exposure to water can damage them. While most are resistant to weather conditions, if struck by lightning, they could get damaged. People can also tamper with them or disable them.
- Doesn’t Always Stop Theft. While it will deter theft, it may not stop it. If someone is determined to break in, they will do so. Security cameras should be part of your security system designed to deter crime. While they collect evidence, they can’t prevent a crime from happening. However, some systems can send you an alert so you can contact the authorities in case of a break-in.
Security Camera Placement Guide For Your Home
Installing security cameras in and around your home is a crucial step in protecting your property, deterring crime, and ensuring the safety of your family. Proper placement is key to maximizing their effectiveness. This guide will help you determine the best locations for your security cameras, the ideal angles, and important factors to consider.
Entry Points and Exits
Front Door
The front door is one of the most critical locations to place a security camera since many burglars enter through the main entrance. Position the camera at a downward angle to capture clear images of faces while avoiding direct exposure to sunlight or glare.
Back and Side Doors
Secondary doors are also common entry points for intruders. Installing cameras at these locations ensures that all access points to your home are monitored. Ideally, place the cameras at least 8-10 feet above the ground to prevent tampering.
Garage and Driveway
A camera facing the driveway can help monitor vehicles, deter theft, and capture footage of any suspicious activity. If your garage is detached, ensure a camera covers both the door and nearby areas.
Windows and Blind Spots
Windows that are not visible from the street are attractive targets for intruders. Positioning a camera to monitor these areas can help prevent unauthorized access.
Outdoor Common Areas
Yard and Backyard
A camera placed in the backyard can monitor potential hiding spots, track outdoor activity, and protect sheds or storage areas.
Porch and Patio
A well-placed camera on your porch or patio helps monitor deliveries, visitors, and any movement near the home.
Indoor Security Cameras
Main Living Areas
Installing cameras in high-traffic areas, such as the living room or kitchen, allows you to monitor daily activity and detect unusual behavior.
Hallways and Staircases
Cameras positioned in hallways or staircases can help track movement throughout the house and ensure no area goes unmonitored.
Important Factors to Consider
- Height & Angle: Mount cameras at least 8-10 feet high and angle them slightly downward for the best coverage.
- Lighting: Ensure proper lighting for clear nighttime recording, or opt for cameras with night vision.
- Weather Protection: Use weather-resistant cameras for outdoor placement to withstand harsh conditions.
- Wi-Fi Signal Strength: For wireless cameras, ensure strong connectivity to prevent video interruptions.
Strategically placing security cameras enhances home security and provides peace of mind. By covering key entry points, driveways, windows, and common areas, you can significantly improve the effectiveness of your surveillance system. Always test your cameras after installation to ensure they capture clear footage and cover the desired areas.
With proper placement, security cameras become a valuable tool in safeguarding your home and loved ones.
Best Solar Powered Security Camera – Perfect For All Weather
Placement Using a Hub
If your security camera system needs a hub, put the camera at an appropriate distance away from the hub. The camera should smoothly connect to the hub over your Wi-Fi or another type of connectivity. If the system doesn’t contain a hub, ensure it is placed close to the range extender or router to receive a good internet speed and connection.
If it isn’t picking up the signal, purchase a range extender. This will extend your Wi-Fi connection.
How to Install Security Cameras (General Outline)
Now that you have a general idea of where you should place your cameras, you can proceed to the actual installation. Each camera contains different processes for setting it up. For the most seamless experience, it is advised to proceed step by step. Ensure you have ample time before beginning, as you don’t want to be interrupted and have to leave the job unfinished.
- Once cameras are ordered, plan their location and create a diagram of where they will be placed. This should encompass the inside and outside of your home.
- Think about where the cameras should be, take them to that location, and temporarily mount them using tape or small nails. Turn them on and test them to see how they work. If they are okay, you can mount them permanently. If they don’t work, you’ve saved yourself the hassle of having to uninstall them.
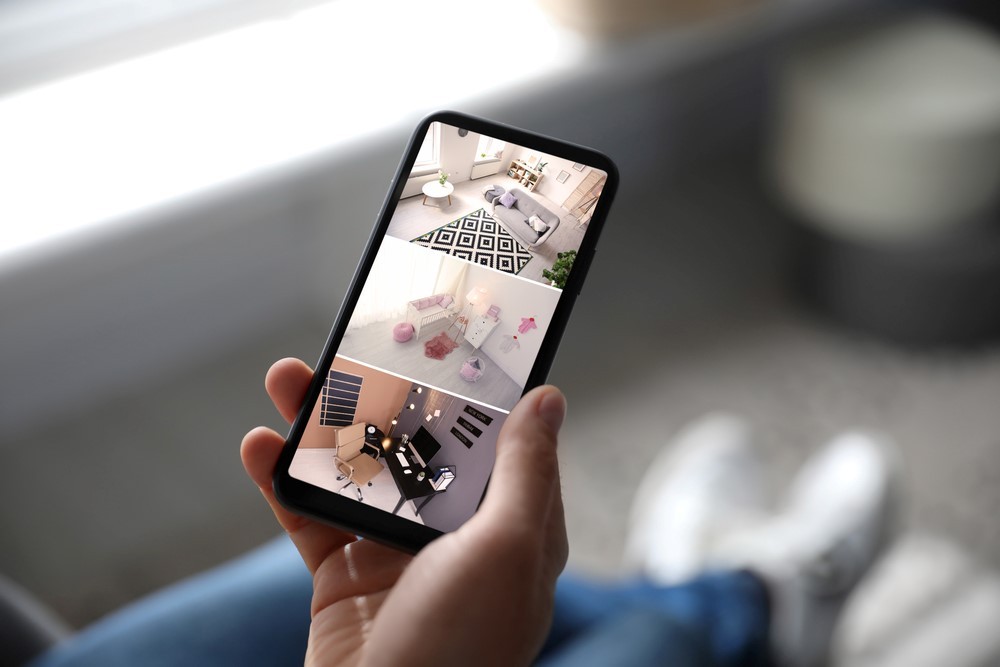
- After installing them, access your live stream feed with a computer or mobile app.
- Customize your settings, which should include brightness and motion sensitivity.
- Confirm that each camera is set up and working correctly.
Wireless Security Camera Installation
- Mount your wireless security camera or place it on a flat surface. Generally, your camera should come equipped with an appropriate mount.
- Connect it to your Wi-Fi.
- Sync the camera system with other connected devices like video doorbells or smart sensors.
Most installations will provide detailed instructions on their mobile app. We recommend following the instructions precisely for the best results.
Wired Security Camera Installation
With a wired security camera system, placement may be limited. The tradeoff for a more secure connection is a more complicated installation.
- Hardwire your video surveillance cameras into your home. Drill holes where you want to mount them, run a cable to each camera, then mount them.
- Ensure the location is stable whenever it is attached to ceilings or walls. This may mean you must find a stud or connect it using drywall screws.
- Check your existing wiring before drilling. This will help you avoid any electrical problems.
- Mark your holes and drill them for your cables.
- Run your wiring.
- Mount your video surveillance cameras. You may be able to plug your camera in and then mount it.
- Some may come with a DVR that can be connected using a power adapter or ethernet cable.
Frequently Asked Questions
Can I install home security cameras myself?
Yes, most home security cameras are designed for DIY installation with simple plug-in, battery-powered, or wireless setups. However, wired systems may require professional installation.
Is it better to have wired or wireless security cameras?
It depends on your needs. Wired security cameras offer a more stable connection and continuous power but require professional installation. Wireless cameras are easier to install and more flexible but depend on Wi-Fi and battery life.
How much does it cost to put security cameras in your house?
The cost of installing security cameras varies based on the type, number, and features of the cameras. DIY setups with a few cameras can cost $100–$500, while professional installations with multiple cameras and advanced features can range from $500 to $2,500 or more.
Summary
When examining how to install security cameras in your home, you will first need to determine placement, then find what system will best meet your needs, and finally ensure you have everything necessary for installation. There are many things to consider regarding the best placement within and around the home. It is best to always take your time before and while installing security cameras at home.
Security Cameras Glossary of Terms
Here’s a Security Cameras Glossary of Terms to help you understand common terms related to home security systems:
A
- AI Motion Detection – Advanced technology that distinguishes between people, pets, and objects to reduce false alerts.
- Angle of View – The area a camera lens can capture, usually measured in degrees.
- Auto-Tracking – A feature that allows a camera to follow moving objects within its field of view.
B
- Backup Storage – A method of storing footage on a cloud service or local device in case of network failure.
- Bandwidth – The amount of data a camera uses when streaming video over the internet.
C
- Cloud Storage – Storing recorded footage on an online server instead of a local device.
- Color Night Vision – Technology that allows cameras to capture nighttime footage in color rather than black and white.
- Continuous Recording – A feature that records video 24/7 rather than only when motion is detected.
D
- DVR (Digital Video Recorder) – A device used for recording and storing video from analog security cameras.
E
- Encryption – Security feature that protects video footage from unauthorized access.
- Ethernet Connection – A wired network connection that provides a stable connection for security cameras.
F
- Field of View (FOV) – The width of the area a camera can see, measured in degrees.
- Frame Rate – The number of frames per second (fps) a camera records; higher fps results in smoother video.
G
- Geofencing – A feature that adjusts camera settings based on your smartphone’s location.
H
- HDR (High Dynamic Range) – Improves video quality by balancing bright and dark areas in an image.
- Hybrid Security Camera – A camera that supports both wired and wireless connections.
I
- IP Camera – A camera that connects to the internet for remote monitoring and recording.
- IP Rating (Ingress Protection) – Measures a camera’s resistance to dust and water (e.g., IP65 is weather-resistant).
- Infrared (IR) Night Vision – Uses infrared light to capture video in complete darkness.
L
- Local Storage – Saving footage on a microSD card, hard drive, or other local storage device.
- Live View – The ability to watch real-time footage from your security camera.
M
- Motion Detection – A feature that triggers recording or alerts when movement is detected.
- MicroSD Card Storage – A storage option that allows cameras to save video locally on a memory card.
N
- NVR (Network Video Recorder) – A device that records and stores video from IP cameras.
- Night Vision – Allows cameras to record in low-light or no-light conditions.
P
- Pan-Tilt-Zoom (PTZ) Camera – A camera with the ability to move horizontally (pan), vertically (tilt), and zoom in/out.
- Privacy Zones – Settings that allow users to block out certain areas from being recorded.
R
- Remote Access – The ability to view camera footage from a smartphone, tablet, or computer.
- Resolution – The quality of a camera’s video, measured in pixels (e.g., 1080p, 2K, 4K).
S
- Smart Detection – AI-powered detection that identifies people, pets, packages, or vehicles.
- Spotlight Camera – A camera with a built-in light that activates when motion is detected.
T
- Two-Way Audio – A feature that allows users to listen and talk through the security camera.
W
- Wide Dynamic Range (WDR) – Enhances image quality by adjusting exposure in bright and dark areas.
- Wi-Fi Camera – A security camera that connects wirelessly to a home network.
Most Popular Posts:
- Do You Need Wi-Fi for Security Cameras?
- Which type of camera is best for home security?
- Do home security cameras record all the time?
- How Much Data Do Security Cameras Use Monthly?
- Can I Install Security Cameras Myself?